
How many times have you ever had to hand over large files or folders containing a large amount of files to other people?
Surely a lot given the amount of data that we are now used to keeping and that we constantly need for the most varied needs.
And when this data has to be provided to third parties, how to do it?
Of course there are many modalities but you will surely agree with me if I say that if we try to use the fastest and cheapest one, our work will be facilitated.
I am still amazed to see how many companies and freelancers nowadays employ means that are not only obsolete but that even require an economic expenditure.
With all the services at our disposal, is it really necessary to travel exclusively to perform an action that can be carried out online in a few seconds?
Not to mention that by moving we lose time that can be used for more profitable purposes, other advantages are certainly the saving of money and energy. In this way, sending material is convenient, but above all fast. The user can decide to transfer the material at any time without having to agree with the recipient.
Quali sono i migliori servizi per inviare materiale digitale?
Nowadays there are many free online services for sending digital material. All you need is a computer and a connection and that’s it. Below I propose what in my opinion are the main services that can be reached directly through the Internet network.
WeTransfer
WeTransfer is one of the online services for heavy file transfer most used by people and companies. It is a very simple and intuitive solution that allows you to send documents, images or other material quickly.
To use the service it is not necessary to register, but there is also a paid version with additional features.
Below we see what are the steps to take to send the material.
1. Compressed Folder Creation
First of all it is necessary to create a folder in which to enclose all the material that you want to send.
For example, if you were to send me some material for your website, create a folder called “Website” in which you will insert subfolders corresponding to the pages of your site.
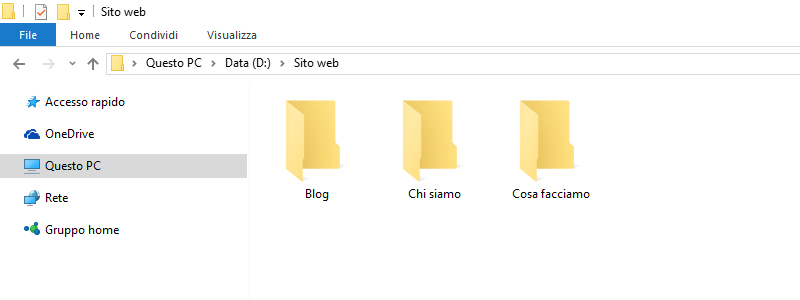
Go to the folder with the mouse => right click => “Send to” => “Compressed folder”.
2. Go to the site
To proceed with the sending of the compressed folder created through the WeTransfer service, you must first report the following link in the URL bar of your browser: http: // www .wetransfer.com /
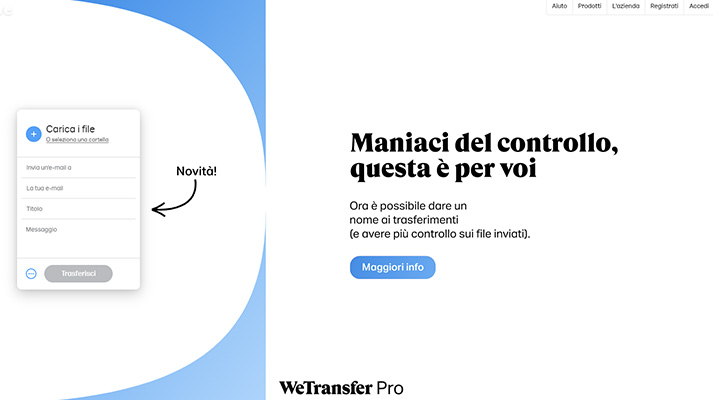
3. Fill in the window
Once you have landed on the reference website, you need to fill in the window that appears:
- + Add file: select the compressed folder from your pc
- E-mail of a friend: enter the email webmarketing@base315.it (email Webmaster)
- Your email: enter your email
- Message (Optional): It is still advisable to insert a subject in the message
- Click on the “Transfer” button
Once these steps are done, your compressed folder will be sent to the recipient in a few moments. You will receive an email notifying that the folder has been sent and a second one as soon as the recipient has downloaded your files.
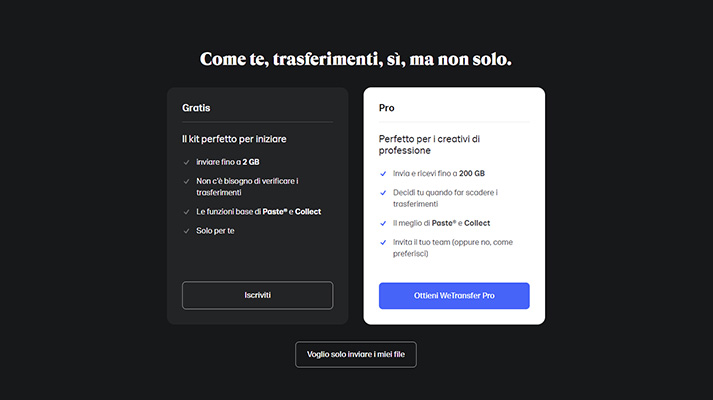
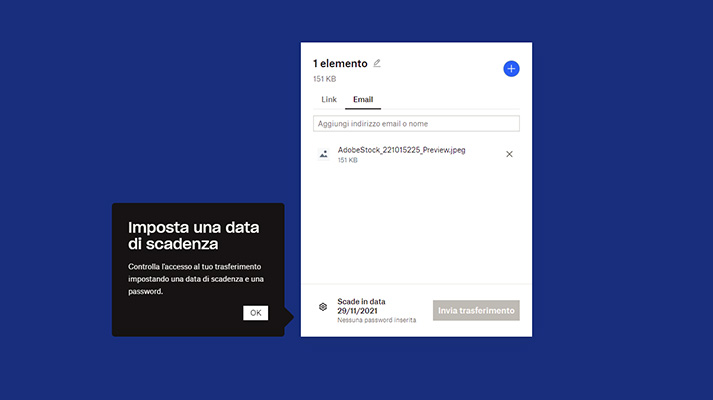
The only flaw is that there are only a few days to download the material (a maximum of 7 days); so if your correspondent does not download the material in the set time you will be forced to send it again.
To overcome this problem there is also a paid version (Pro) that allows you to set passwords and expiration dates for your transfers. Below you can observe the main differences between the two solutions offered by WeTransfer.
Dropbox Transfer
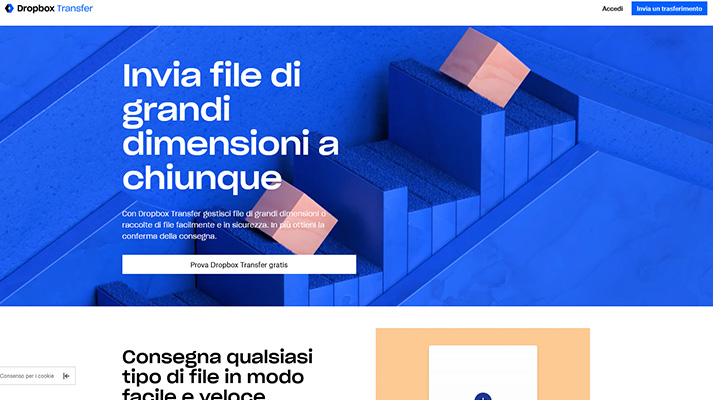
Dropbox is another popular file transfer service. This service allows you to send up to 100GB per transfer and allows anyone to access your files, even if they don’t have an account. To send the files, you can proceed in two directions:
- if they already exist in your Dropbox account, the download link will be generated instantly;
- if you do not have an account or have not yet entered the files to transfer, then in this case you will have to upload them. The transfer can be a single file or an entire folder and takes place in complete safety.
Dropbox Transfer releases the confirmation of successful delivery of the transfer.
In particular, like WeTransfer, the Dropbox Transfer service also presents a free version that allows you to send content up to 100 MB, and paid versions for file volumes up to 100 GB.
How to send a file with Dropbox Transfer?
- Click on “Send a transfer” located at the top right of the site’s homepage.
- Upload the file or folder you want to send.
- Enter the recipient’s email and proceed with sending the transfer.
Do you want to know how to increase visits to your website?
Book a free appointment online now.
JumboMail
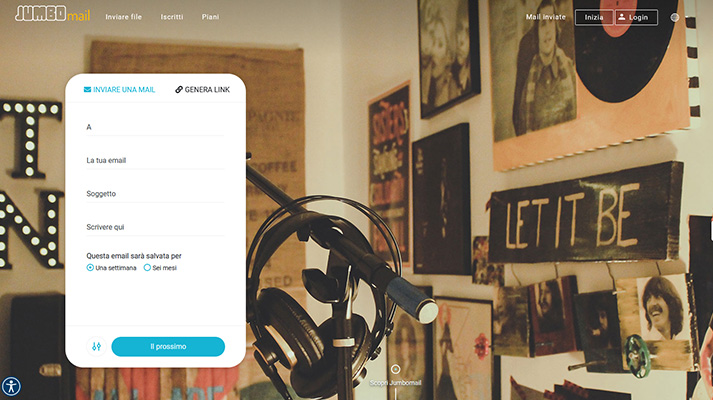
JUMBOmail is an online service that allows you to send and share large files. The files can reach a maximum weight of 20GB and the transfer takes place simply and in total safety. An account is not required to send files or to receive them.
As you can see from the image above, the file transfer is very simple. Only the following fields need to be filled in:
- Email of recipient
- Email of origin
- Subject
- Any message
Once you have entered the required fields, you can proceed with entering the file or folder you want to transfer.
JUMBOmail has several plans: the free one allows you to send up to 2GB, while the paid ones allow you to transfer a certainly higher amount of files, reaching a maximum of 20GB.

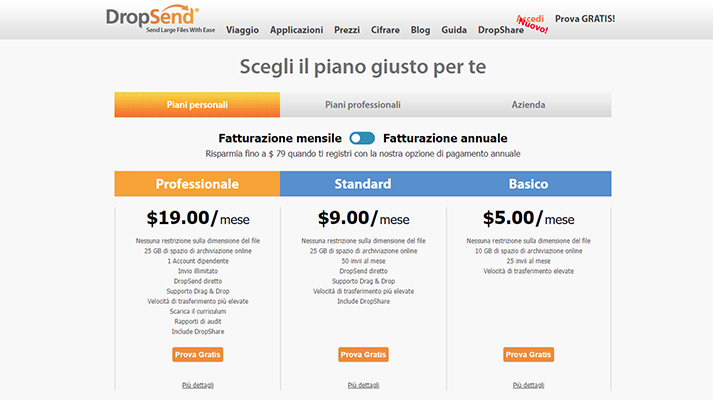
Drop Send
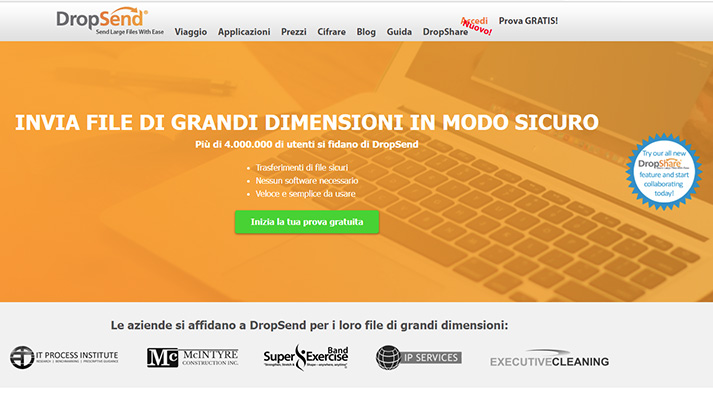
DropSend is another online service for sending heavy material. Compared to the previous solutions, it requires registration and you can choose one of the packages you find below. For each version the service offers the possibility to carry out a free trial to test the correct functioning of the file transfer.
The DropSend platform is fast, simple, but above all safe. The recipient doesn’t need a DropSend account to access the files.
Transfer Big Files
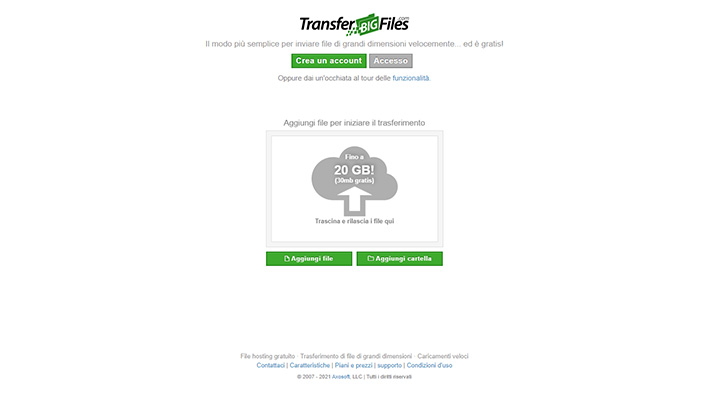
TransferBigFiles is another online tool used for sending heavy material. Also in this case it is a very intuitive and easy to use service. There is a free version that allows you to send a maximum of 30mb, or if you choose a paid package you can proceed with the transfer up to 20GB. With a paid account you get permanent storage space, receipt notifications, transfer history, and the ability to receive large files.
Here are the steps to proceed with sending your material
- You can add files or a folder. Simply click on the option you wish to perform.
- Once the first step has been performed, the following screen will appear:
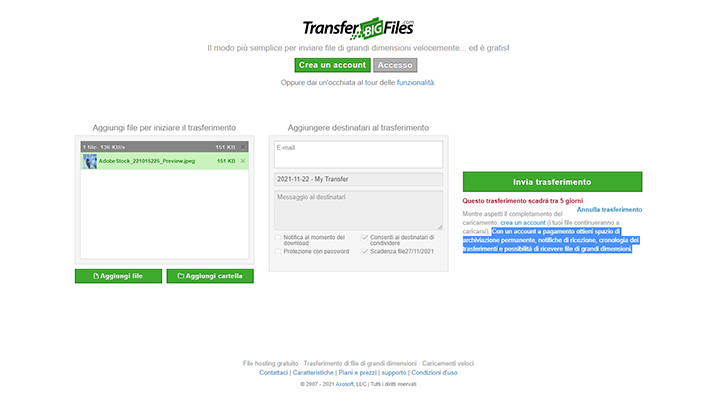
Here you can enter the email address of the recipient to whom you want to send the file and any message.
3. Once you have filled in all the required fields, you can click on “Submit Transfer” to complete the process.
In the free version the recipient has a maximum of 5 days to download the transfer. After the deadline, the recipient will no longer be able to download the file and the user will have to send the material back.